When making use of the Azure Active Directory Identity Provider to allow clients to authenticate, you don’t always want to make the exact details of this Identity Provider available to the public. Either you want to reduce the amount of information that might link back to the used technology stack, increase the level of control you have or provide increased monitoring.
By hiding the Identity Provider behind an endpoint in API Management you decide what level of details others need to know - do you want/need to expose the value of the scope? - simply limit how many attempts one can make within a specific time-frame - let’s make a brute force attack take longer, shall we? - and make use of Application Insights to track how many (false) attempts were made at authenticating.
Steps
Overview
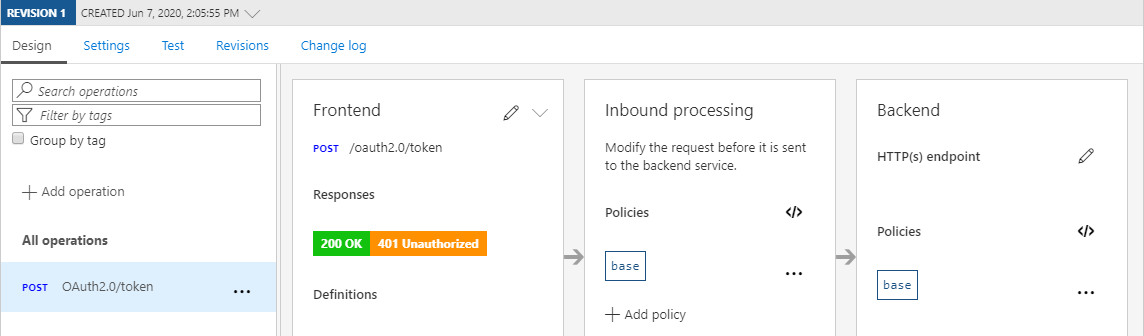
Let’s start off with a high-level overview of how such a setup would look like and how this affects the flow of requests/responses.
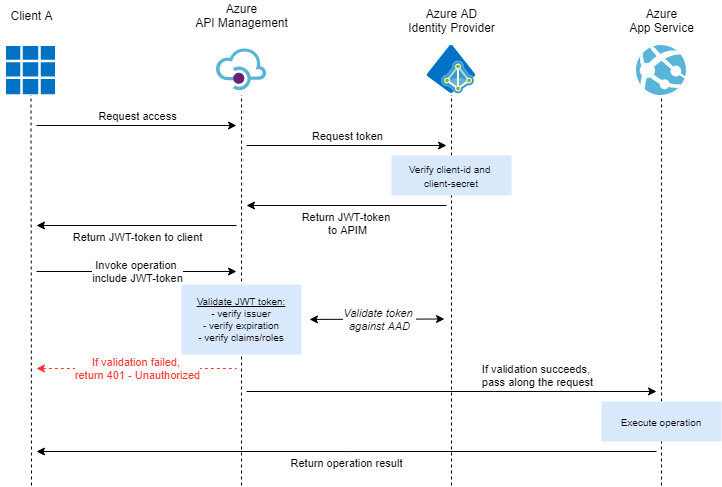
As you can see, by hiding the Azure AD Identity Provider behind your API Management you will be in full control of how your AAD-endpoint is being accessed. While this does add an additional step, the impact on performance is quite limited.
Create a new API
When adding new endpoints, it’s important to look towards the future, as you don’t want to be forced to redesign your entire architecture over and over. So, when exposing an endpoint which is used to request a new OAuth bearer-token, even though initially you could be using this for only a single API, this is in fact something which is perfectly reusable for multiple future API’s.
Additionally, in many cases you don’t want to force the use of a subscription key when requesting an OAuth-token, while for any other API you might require the use of a subscription key.
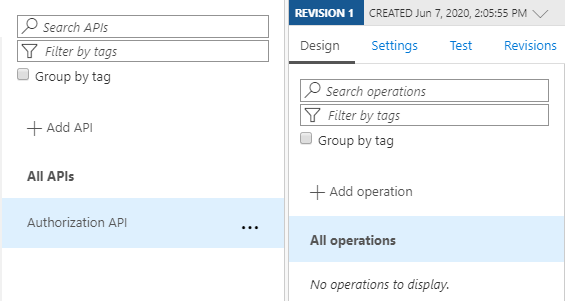
Because of this, we’ve created a new blank API within our API Management instance, specifically to host this OAuth2.0/token-endpoint.
Create a new operation
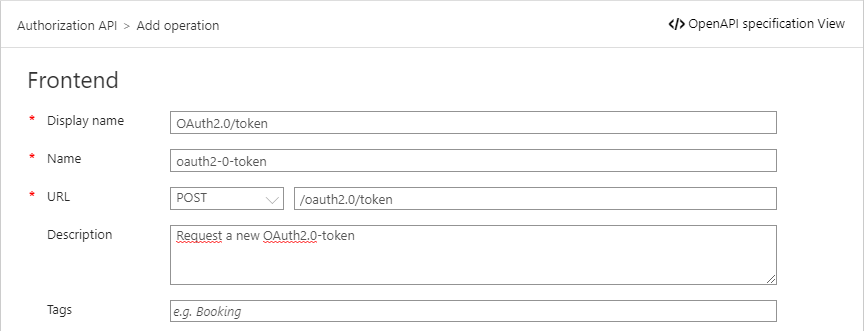
Now we have an API, it’s time to add the OAuth2.0/token-endpoint.
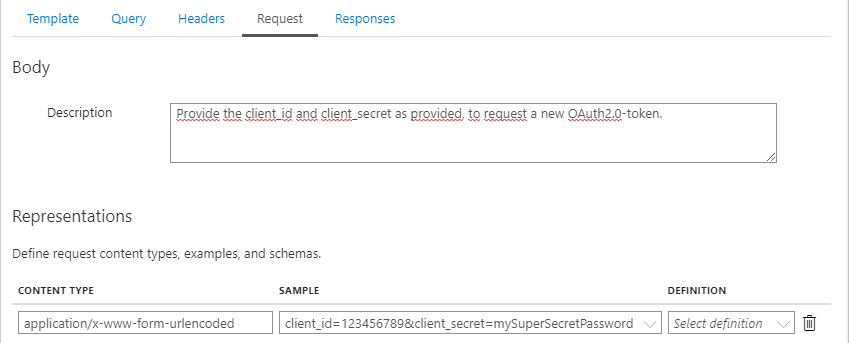
Let’s also provide some information on how the request should look like.
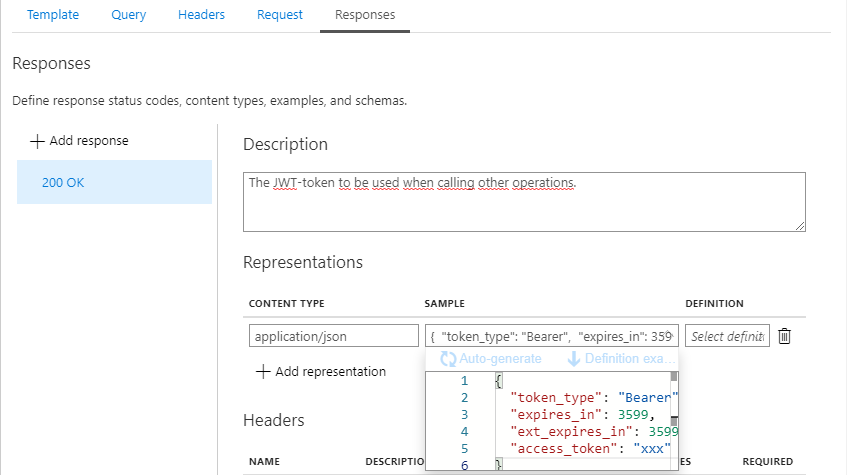
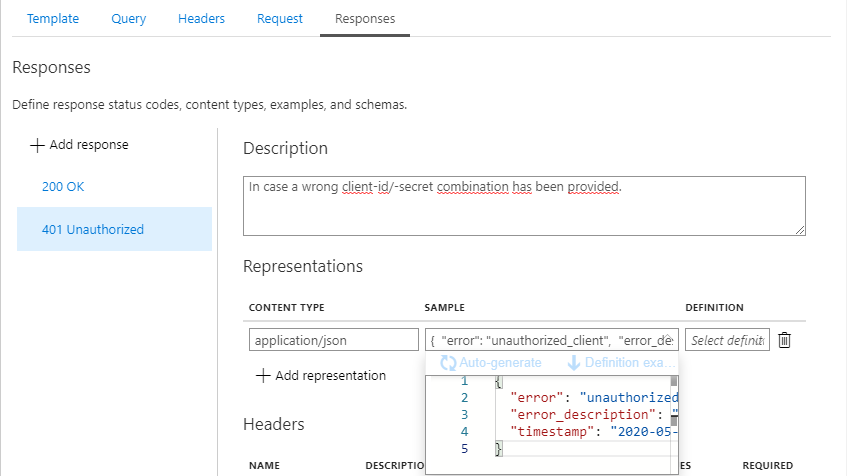
While we’re at it, let’s also set the possible response-codes along with a sample response:
- 200 OK
- 401 Unauthorized
After clicking the save-button, the new endpoint is being created, but as long as we haven’t specified any policies, no tokens will be returned.
Set the policy
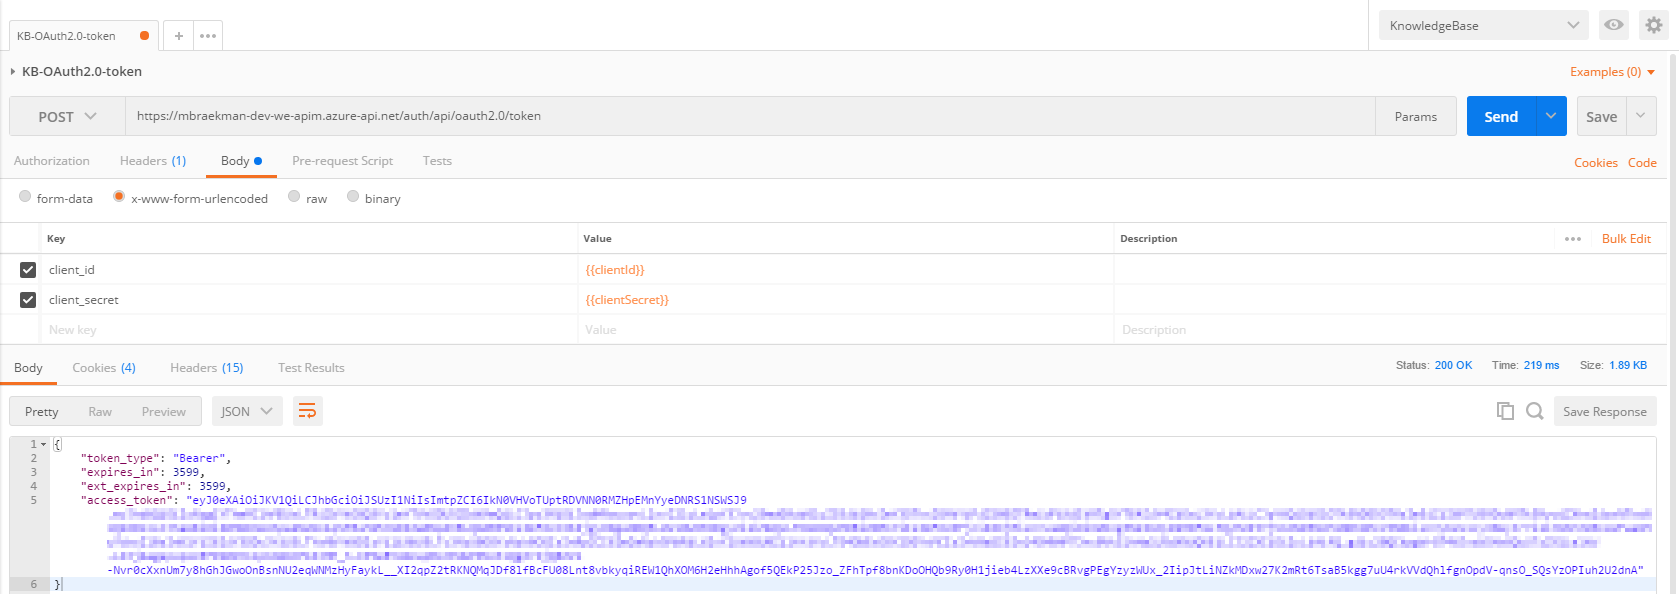
As you might have noticed above, the request content-type will be set to ‘application/x-www-form-urlencoded’, while the body will consist of ‘client_id=123456789&client_secret=mySuperSecretPassword’.
However, as you could read over here, the AAD Identity Provider endpoint, requires some additional information, such as the scope and the grant_type.
By including this endpoint in API Management, we can limit the amount of information we need to share with clients. In this case, we don’t need to share the scope or the grant_type with any of our clients since it would be the same for all of them, as we’ll be making use of appRoles to verify who is allowed to call a specific API.
This does require us to build up the actual body before forwarding the request to the AAD-endpoint. Have a look at below policy to see this can be achieved.
<policies>
    <inbound>
        <!-- Set the URL for the AAD OAuth v2.0 token endpoint. -->
        <set-backend-service base-url="https://login.microsoftonline.com" />
        <rewrite-uri template="/{{AD-OAuth-Tenant-Id}}/oauth2/v2.0/token" copy-unmatched-params="false" />
        <!-- Specify the method -->
        <set-method>POST</set-method>
        <!-- Explicitly set the Content-Type header -->
        <set-header name="Content-Type" exists-action="override">
            <value>application/x-www-form-urlencoded</value>
        </set-header>
        <!-- Retrieve the body to pass along the properties -->
        <set-variable name="request-body" value="@(context.Request.Body.As<string>())" />
        <set-body>@{
            string request = (string)context.Variables["request-body"];
            string[] requestProperties = request.Split('&');
            string client_id = "";
            string client_secret = "";
            // set the scope and grant_type to be used
            string scope = "https://{{Gateway-Name}}.azure-api.net/oauth2/.default";
            string grant_type = "client_credentials";
            for(int propertyPosition = 0;propertyPosition < requestProperties.Count();propertyPosition++) //>
            {
                if(requestProperties[propertyPosition].Contains("client_id"))
                {
                    client_id = requestProperties[propertyPosition].Replace("client_id=","");
                }
                else if(requestProperties[propertyPosition].Contains("client_secret"))
                {
                    client_secret = requestProperties[propertyPosition].Replace("client_secret=","");
                }
            }

              string htmlEncodedScope = System.Net.WebUtility.HtmlDecode(scope).ToString();
              string htmlEncodedSecret = System.Net.WebUtility.HtmlDecode(client_secret).ToString();

              return "client_id="+client_id+"&scope="+htmlEncodedScope+"&client_secret="+htmlEncodedSecret+"&grant_type="+grant_type;
        }</set-body>
    </inbound>
    <backend>
        <base />
    </backend>
    <outbound>
        <base />
        <!-- remove headers that might identify the underlying technology -->
        <set-header name="x-ms-request-id" exists-action="delete" />
        <set-header name="x-ms-ests-server" exists-action="delete" />
        <!-- Modify the response to simply return 401 without indicating whether clientID is unknown or secret is wrong -->
        <choose>
            <when condition="@(context.Response.StatusCode == 400 || context.Response.StatusCode == 401)">
                <set-status code="401" reason="Unauthorized" />
                <set-body>@{
                        return new JObject(
                                new JProperty("error","unauthorized_client"),
                                new JProperty("error_description", "Verify whether the correct client-ID and secret have been provided."),
                                new JProperty("timestamp", DateTime.UtcNow.ToString("yyyy-MM-dd HH:mm:ssZ"))
                            ).ToString();
                    }</set-body>
            </when>
        </choose>
    </outbound>
    <on-error>
        <base />
    </on-error>
</policies>
As you can read in the comments of the policy, you need to handle the error-response yourself. If you wouldn’t, the error returned to the caller would be:
- 400 Bad Request
In case the provided client_id is unknown to AAD. - 401 Unauthorized
In case the provided secret is incorrect for the given client_id.
While this could be helpful, it also provides an indication to whoever calling the API whether he’s on the right track with the provided id/username, which is something you want to avoid.
After saving the above policy, a Postman-request can be created, which will look like this:
Have a look at Application Insights
Another benefit of creating an endpoint within API Management is additional monitoring, provided out of the box when linked to an Application Insights instance. This means every request, whether succesful or not, will get logged as well, providing a detailed overview.

Conclusion
By making use of API Management, you can hide the actual AAD-endpoint from the outside world and have full control of how the response will look like, who can access it (for how many times an hour), what authentication methods are allowed and have additional monitoring, using Application Insights.